I drink more coffee than ever now, but it is still just two cups a day (up from one day a week). I was doing one cup a day for a while, but decided I would be better off drinking one less can of soda and replacing it with another coffee. I think that has worked okay, but I still drink at least one soda a day. Any coffee person will say that to get the best coffee taste you need to grind your own beans. Back in 2015 I found a cheap (about $15) manual grinder on Amazon, which uses a ceramic burr grinder, preferred over the little electric blade grinders. Eventually it broke, but I was able to get some spare parts for $5 and have been using it ever since. The part that broke was a plastic spacer that holds the axle of the crank. It is not a great design that a tiny plastic part is the weak link. But it was also a bad design because the axle was too loose, allowing the burr to be off center, meaning you would get some finely ground coffee and some coarser coffee. I grind the coffee while the water is heating up in the microwave and it takes about a minute to grind enough beans for one cup of coffee. Sometimes more than a minute. I would adjust for a coarser grind to stay around a minute so the water wouldn’t sit too long.
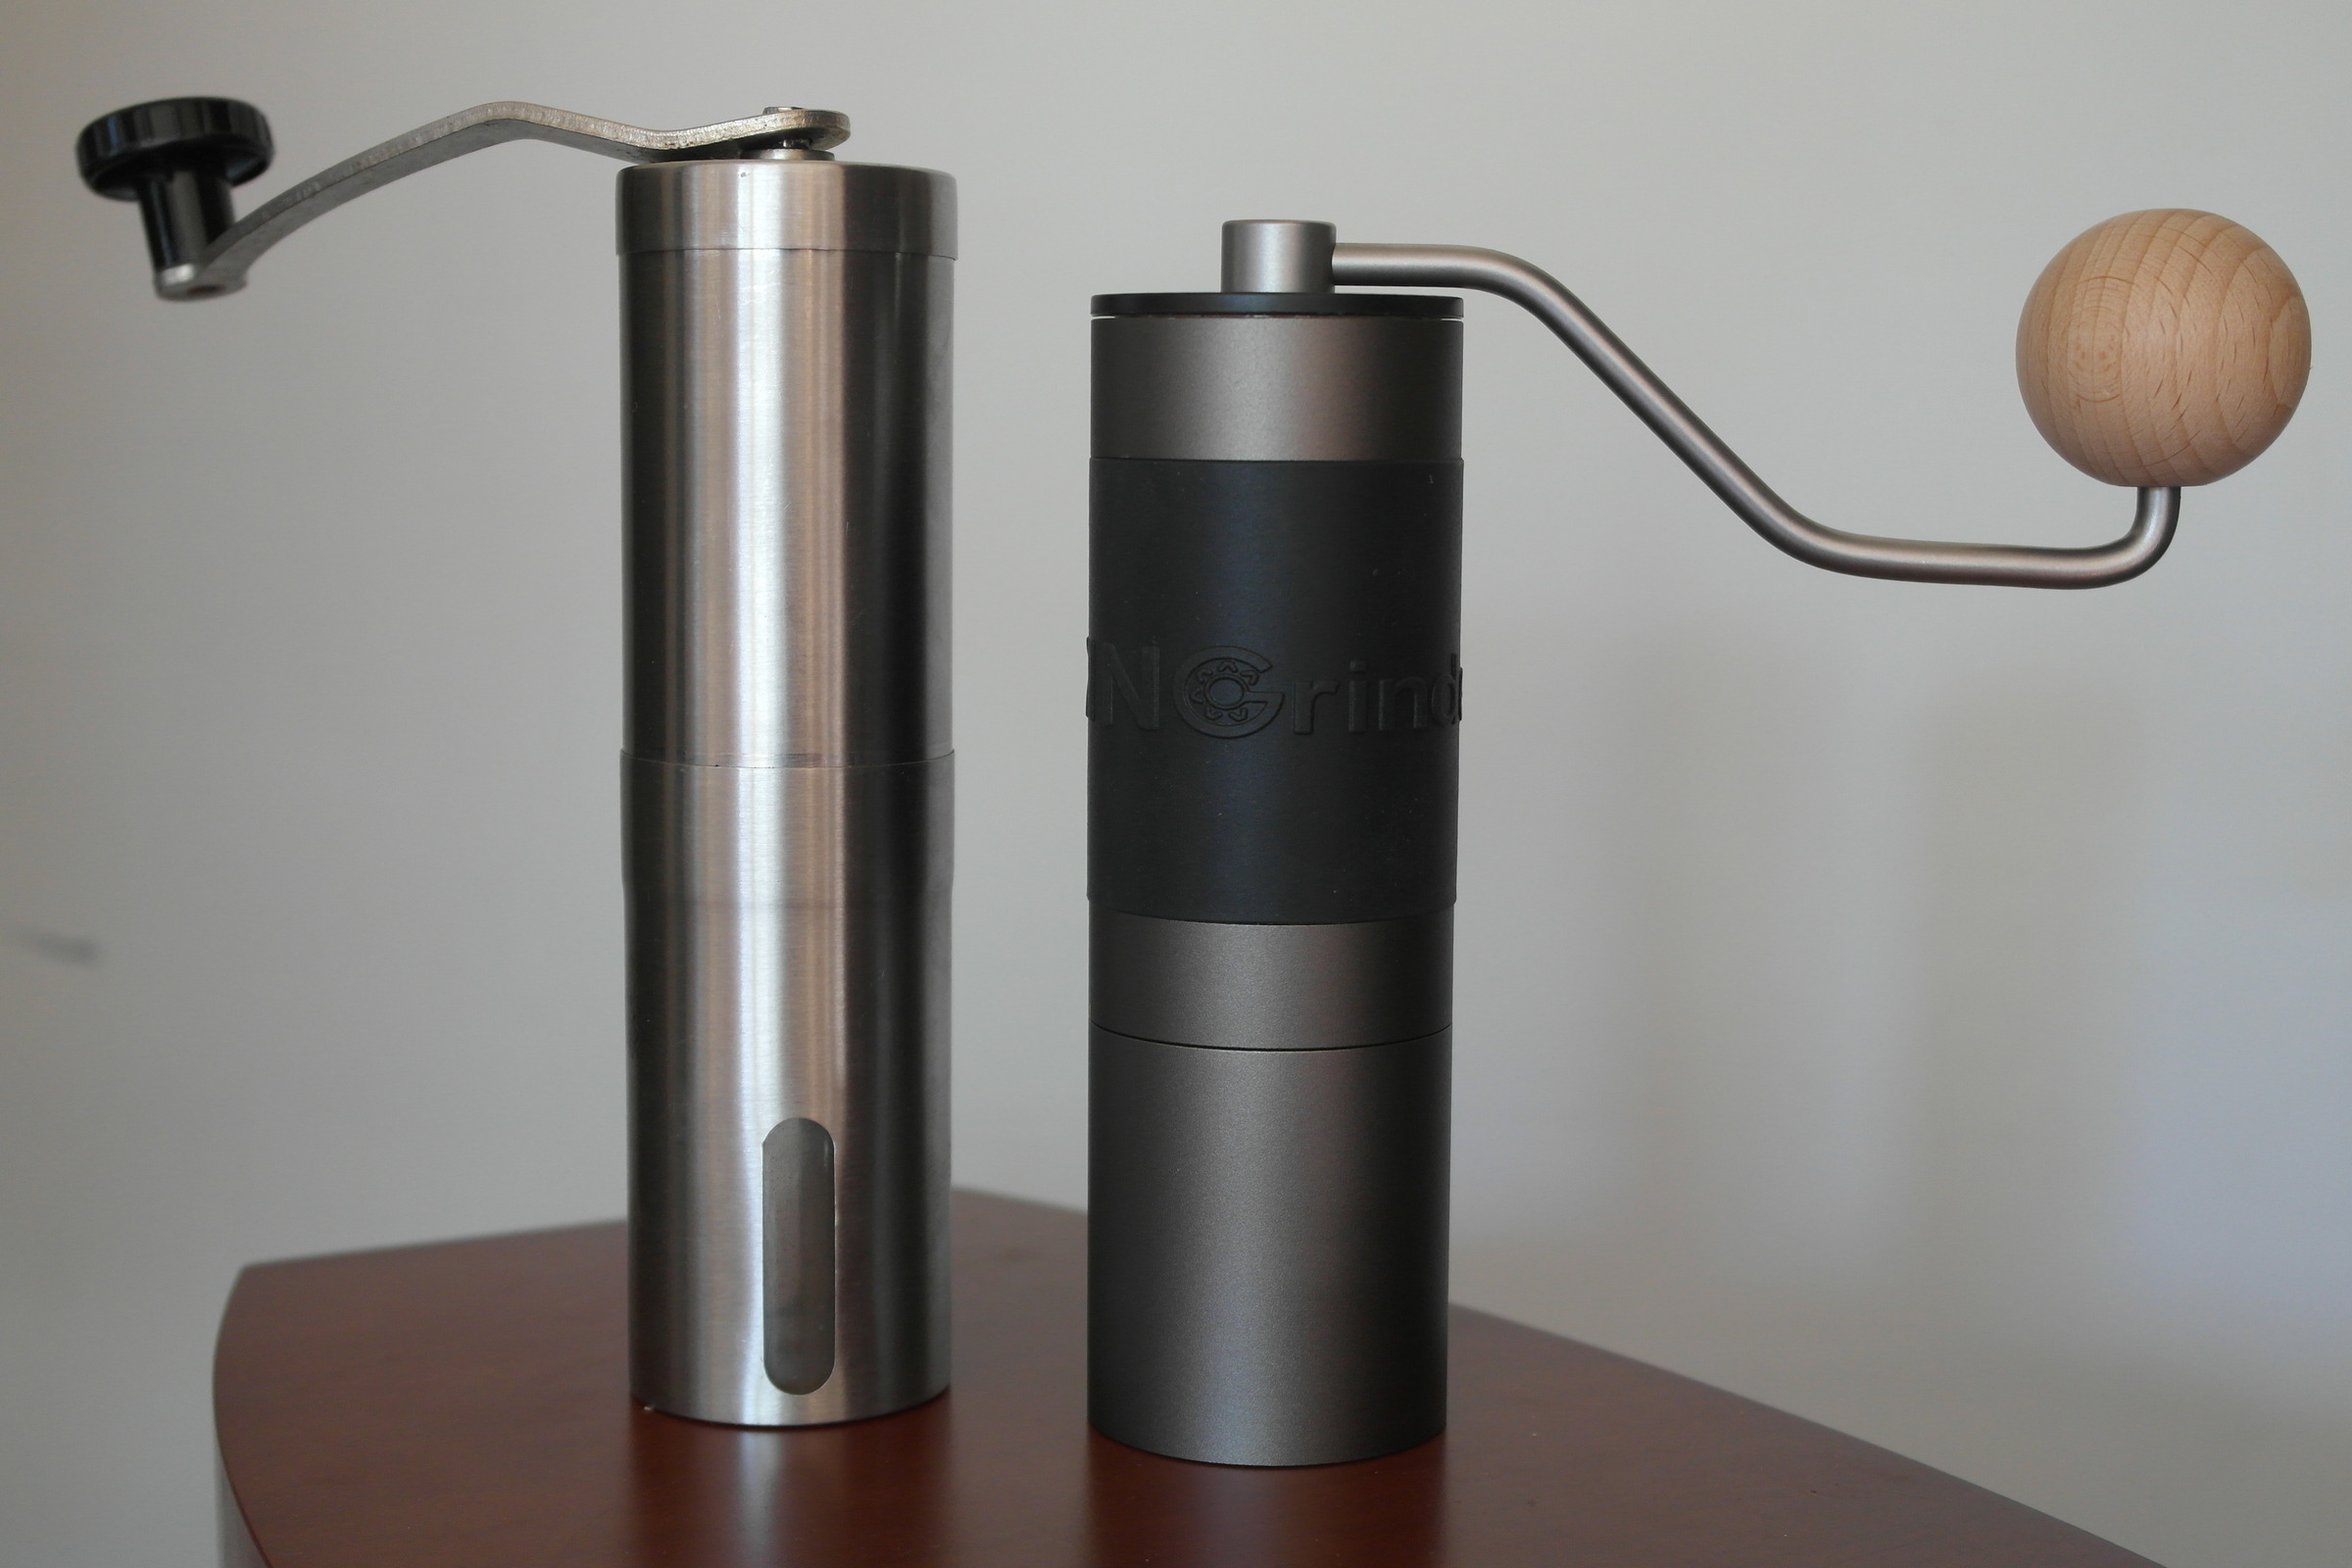
For some reason I was looking up grinders and fortunately came across a subreddit where someone was going to try to fit a stainless steel burr on their cheap grinder instead of the ceramic one it came with. I think someone pointed out that the problem isn’t really the burr, it’s that the axle is too loose. They said rather than mess with that, just get a KINGrinder K0 for $30 which already has a steel burr and is known to work fine. The KINGrinder K0 is the low end model of a series of manual grinders that goes way up in price. The K0 is listed at $50, with the K2 at $80, and the K6 at $130. Amazon has a coupon on most of these for $20 off, which gets the K0 down to a more reasonable $30. But $20 off of the $80 one is still too much for a manual grinder. One guy reviewing the K0 at Amazon said people should just spend “a little more money” and get 1zpresso’s low end grinder (for $109, no coupon available). 1zpresso’s high end model, still a manual grinder, is $289! One seeming advantage of the higher end models is they can grind beans into a fine powder required for Turkish coffee or espresso, and can do it fairly quickly. One person reviewing the K0 said they would grind for 15-20 minutes to get the finest grind. That worried me a little except I don’t really want a fine grind. Using an Aeropress with paper filters, it isn’t that important to have a fine grind or even a particularly consistent grind, though I think a consistent grind should give better results. For French press coffee makers it is essential to get consistently large chunks because the filter on a French press lets all of the smaller pieces through into the coffee.
So I splurged on the K0, hoping at least that it would be better built than my cheap one with the wobbly axle and plastic parts. It arrived today in a surprisingly heavy box. The old one weighed 9 ounces. The new one weighs in at 20 ounces. Over a pound! A lot of that weight is in the housing, which doesn’t need to be thick. The adjustment to grind thickness gives a much better metallic click for each setting. I picked what I thought would be reasonable and ground some beans. It really doesn’t have much capacity, with my 3 tablespoon Aeropress scoop filling it almost to the top, but that’s all I need. It seemed like it was done in less than 30 seconds. I looked at the results and they were a little coarse, but probably close to what I have been doing. I adjusted it to a finer setting and dumped the grinds back into the top. This definitely took longer but gave me a finer grind than I usually use, which is great. There is no wobble at all. I didn’t take a close look at the grinds to try and determine if they were uniform in size, but I can’t imagine it is a problem. This is just a very well made piece of machinery. The cheap ones are still around $20, so for only $10 more the step up in quality is very substantial. The old one had plastic parts and was made of sheet metal. The only plastic on the new one is the lid and the housing is made of cast metal that is then machined. I took it apart when I finished using it and forgot what setting I left it on, so I just guessed a setting. This morning I ground a scoop of beans and timed it using the microwave’s clock as the water heated. 30 seconds! And when I looked at the grounds, they were actually quite fine, finer than I ever grind myself. Finer than what is in K cups. Not espresso, but not that far off. This is just very impressive.
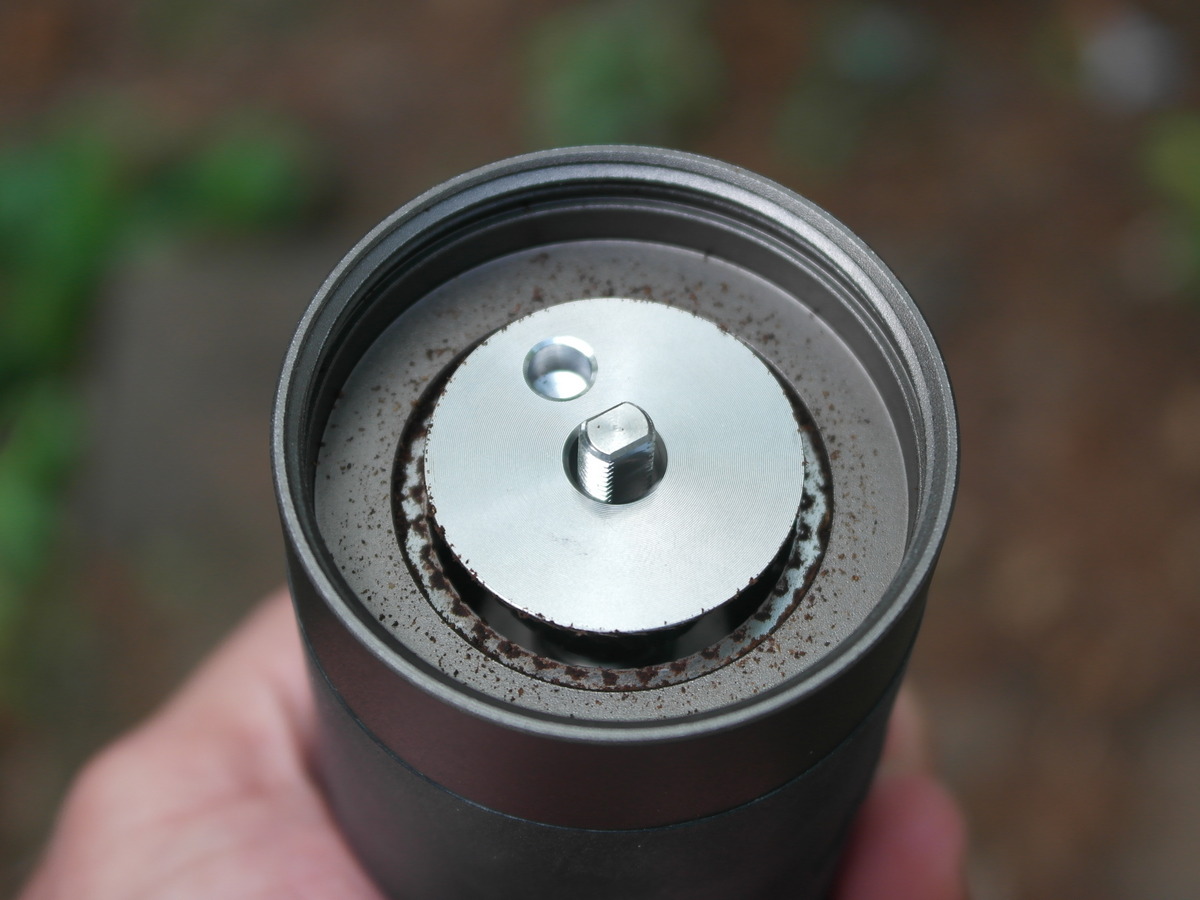
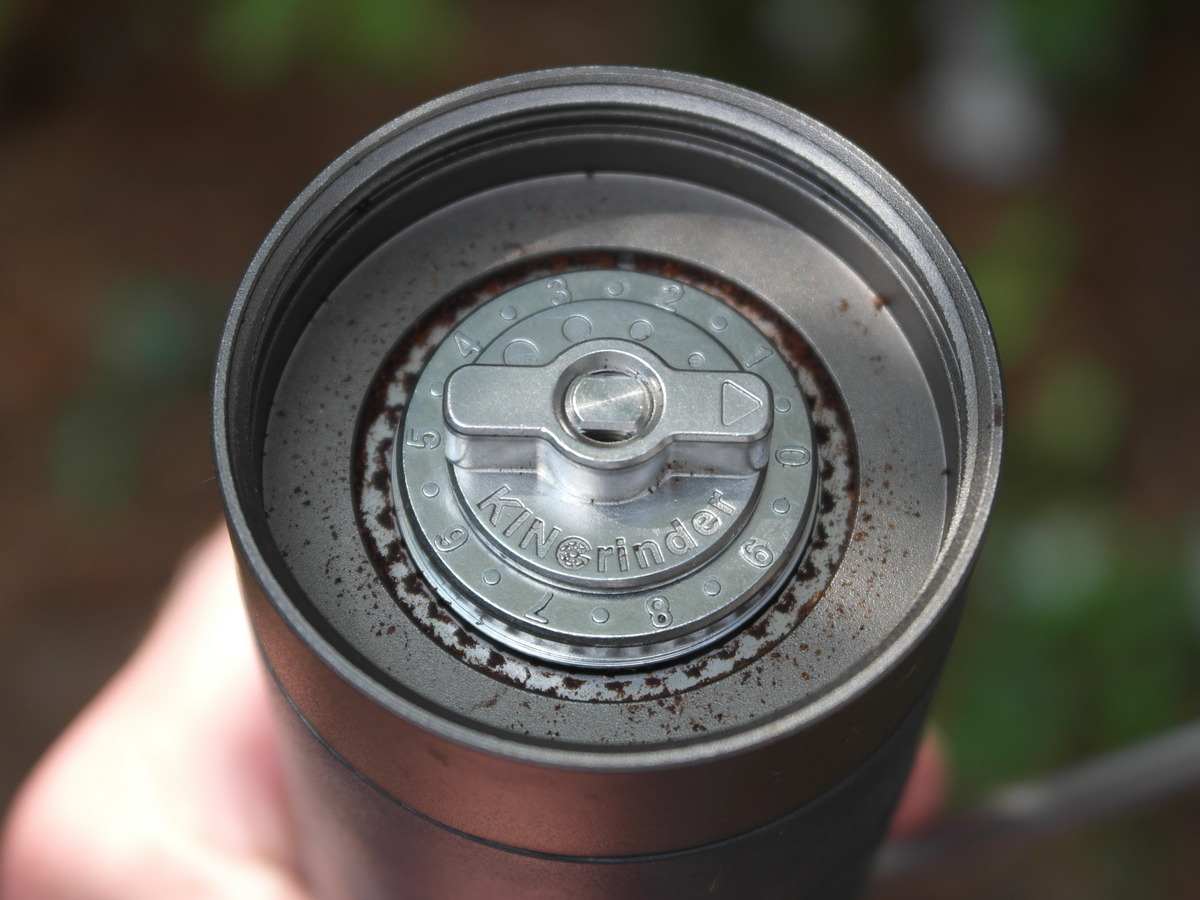
I took the grinder apart. Mysteriously the instructions say do not use water when cleaning it. I am not sure what that is about, but I suspect the bearings for the shaft are sealed and they don’t want water to get in there. The other parts could be cleaned I would think. One neat feature of the grinder is an indicator on the bottom with numbers that shows how much you have tightened the burr down, which controls how fine the coffee is ground. The plate shows number 0 to 9 and when fully tightened is almost 0. Mine actually reads more like 1, but if I made it really tight, maybe it would go to zero. But you don’t want to set it to 0 or 1 because I don’t think anything would come out. Instead I have been turning one full rotation back to 0 and then another full rotation to 0. They call this a setting of 2.0. I could do a further half turn to 5 and it would be 2.5. So the numbers are like 10ths of a turn. And the wheel clicks 4 times going from 2.0 to 2.1, so you can dial in 2.125, 2.150, or 2.175 if you want. The beauty of this is you can go back to your favorite setting pretty easily by counting complete turns and then reading the numbers. The problem was when I put the grinder back together and it was almost as tight as I could make it, the arrow now pointed to 6 instead of 1 which it definitely had pointed to originally. I tried unscrewing the tightening nut (the part with the arrow, shown below) entirely and making sure I starting tightening from different numbers, but that didn’t work. The number plate itself (the part with the numbers) has a rectangular hole in the middle and a peg on the bottom that fits into the bottom of the burr so you can only put it on one way, but I needed a way to rotate that 180 degrees. I realized the problem wasn’t the number plate, but that the burr itself could be rotated 180 degrees before putting the number plate in place, even while on the axle. Then that would get the number plate to line up with the threads correctly. I looked for some kind of indicator on the axle that might give you a hint that one side or other of the axle was where the peg hole should go, but they looked identical to me. I could try using a nail to punch a divot into the flat part of the axle on one side. Or I could just take my chances every time I put the grinder back together and then do it over if I get it wrong.